Your cart is empty.
shop now
Your cart is empty.
shop now
The TA Instruments Thermogravimetric Analyzer (TGA) 2050/2950 offers the ability to measure and evaluate the rate and amount of weight change in a material when either exposed to increasing temperatures or held isothermally over time, in a controlled atmosphere. This device is commonly used to identify phase transitions that may occur due to decomposition, oxidation or dehydration, and the findings can be used to calculate the percent weight change, as well as to link chemical composition, processing and end-use performance.
Installing hang-down wires and aligning sample hang-down wires is one of the step of repacking the TGA 2050 and TGA 2950. In this article, the specific steps will be introduced in detail.
It should be noted that take care not to bend the hang-down wires or damage the hang-down loops during installation.
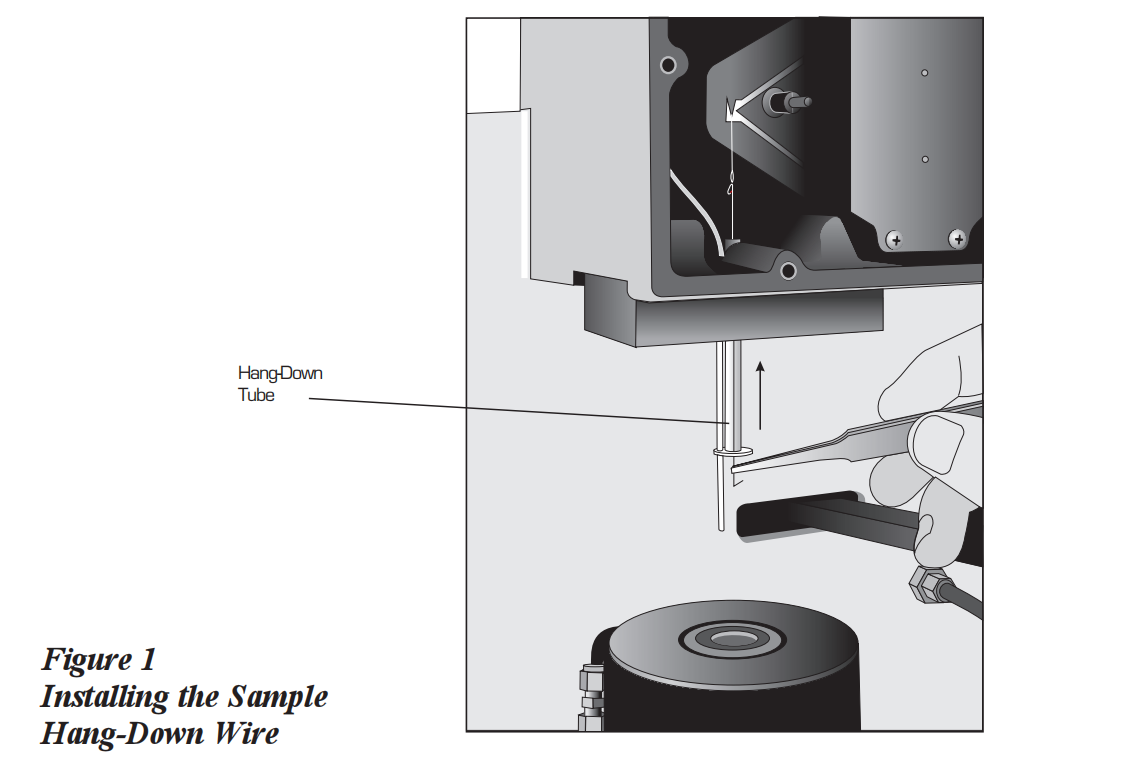
1 Turn on the TGA instrument.
2 Press the FURNACE button to decrease the furnace's temperature.
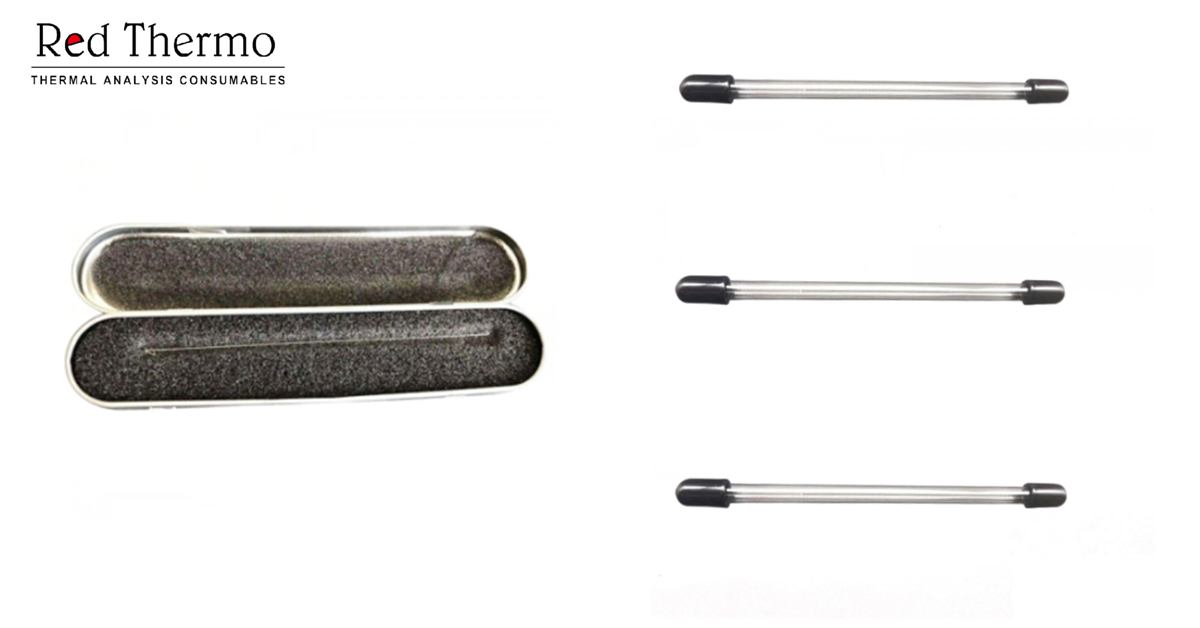
3 Locate the sample hang-down wire in your TGA Accessory Kit.
4 Hold the wire in your hand with the upper hook bent twice to the left and the lower hook 5 bent to the right.
6 Insert the bottom of the hang-down wire into the top of the furnace so that the top of the wire can be placed in the hang-down tube without having to bend it (see figure 1.).
7 Feed the hang-down wire through the hang-down tube, securing it over the top of the tube once it has been fully inserted into the balance chamber (see figure 2.).
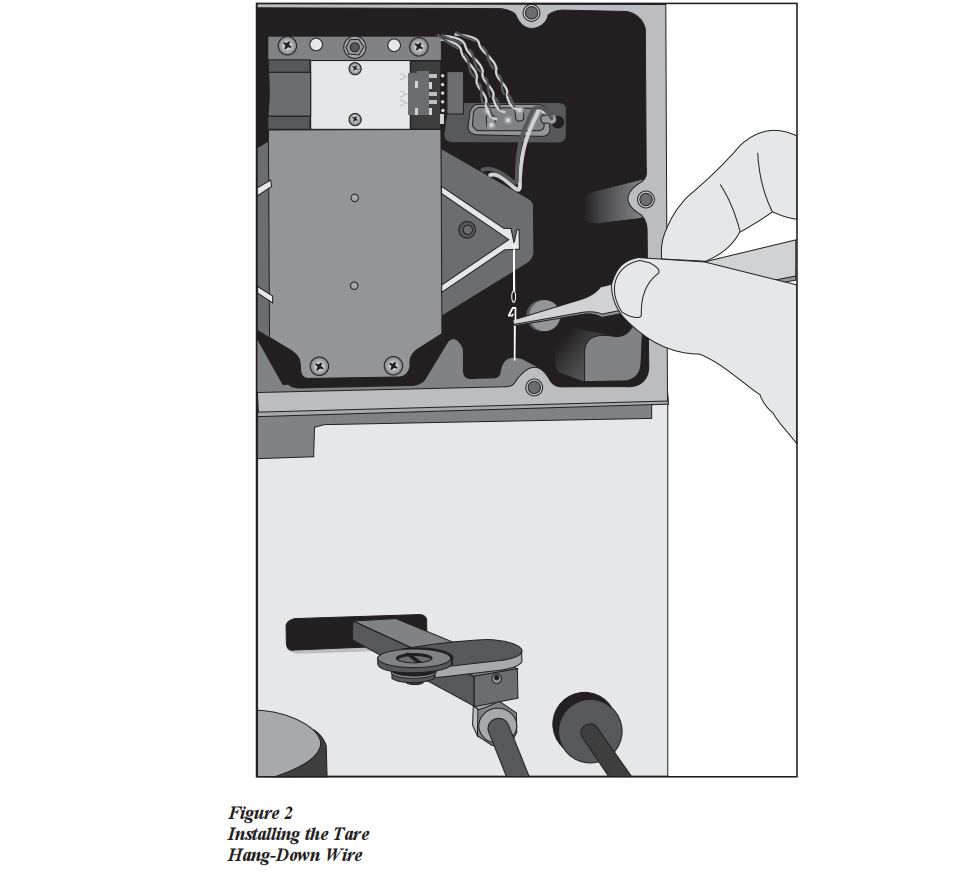
8 Using brass tweezers, take hold of the highest hook on the suspension wire. Make sure the hook is pointing to the left, then thread the double bend of the wire through the droop loop so the wire is suspended from the loop.
9 Unscrew the tare tube and take it out.
10 Locate the tare hang-down wire in the accessory kit you have.
11 Grasp the wire in your hand such that the top hook, which is bent twice, is facing left and the bottom hook is facing right.
12 Insert the tare hang down wire into the balance chamber on the tare side, utilizing brass tweezers, and ensure it passes through the hole above the tare tube connection without bending it.
13 Ensure the top hook is facing leftward and thread the double bend through the hanging loop so the wire is suspended from it.
14 Select the sample pan you will use in your experiments and load one of the same size and type onto the tare hang-down wire.
15 Secure the tare tube and tighten it by hand to press the O-ring into place.
Aligning the sample Hang-Down Wires
It is essential that the TGA instrument is leveled, so that the sample pan and hang-down wire do not touch the furnace or hang-down tube. In order to diminish weight signal noise, it is important to use a stable table or bench for the TGA. This is because the angle of the pan is sensitive to small inconsistencies in the benchtop.
After placing the TGA in its desired spot, use the following steps to level it and adjust the top and bottom of the sample hang-down wire.
To align the top of the sample hang-down wire:
1 Position an empty sample pan on the sample platform.
2 To begin, press the LOAD key on the instrument keypad. The TGA will then lower the furnace (if needed), shift the sample platform to the furnace and place the pan on the balance. If the pan does not load automatically, it is necessary to use brass tweezers to place it by hand on the sample hang-down wire, then continue the process.
3 Verify that the upper part of the sample hang-down wire is unrestrained and approximately positioned in the middle of the hang-down tube located inside the balance chamber.
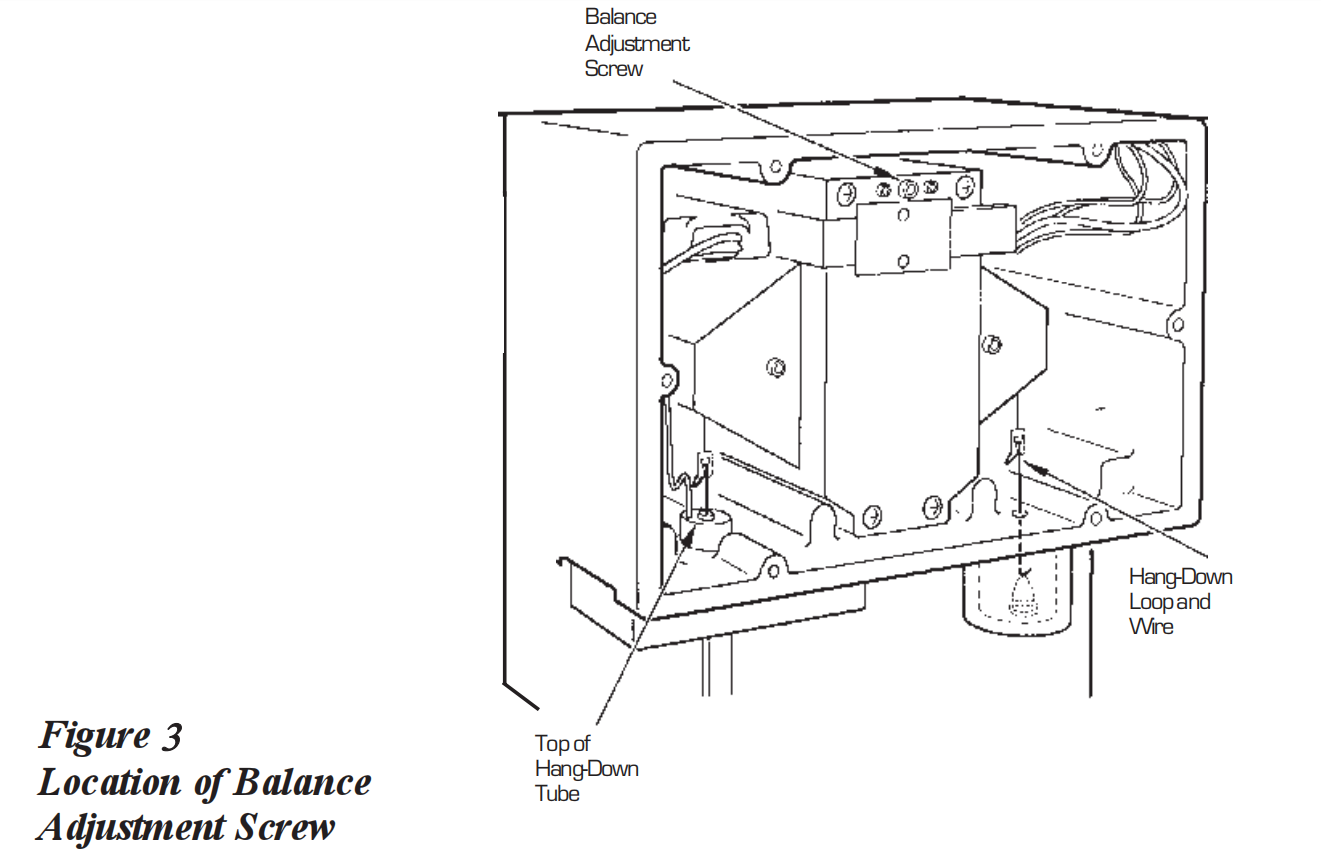
4 Utilize a 7/64-inch ball driver to turn the balance adjustment screw (see figure 3.) until the wire is positioned in the middle of the hang-down tube if it is not already there.
Rotating the balance adjustment screw in a clockwise direction will cause the wire to shift to the rear; conversely, turning the screw counterclockwise will move the wire forwards.
To align the bottom of the hang-down wire:
1 Press the FURNACE button to lift the furnace up to the bottom of the sample pan and then press STOP.
2 Verify that the sample pan is properly aligned within the furnace. It should be suspended freely, positioned approximately in the middle, and not coming into contact with either the furnace walls or the hanging tube (see Figure 4).
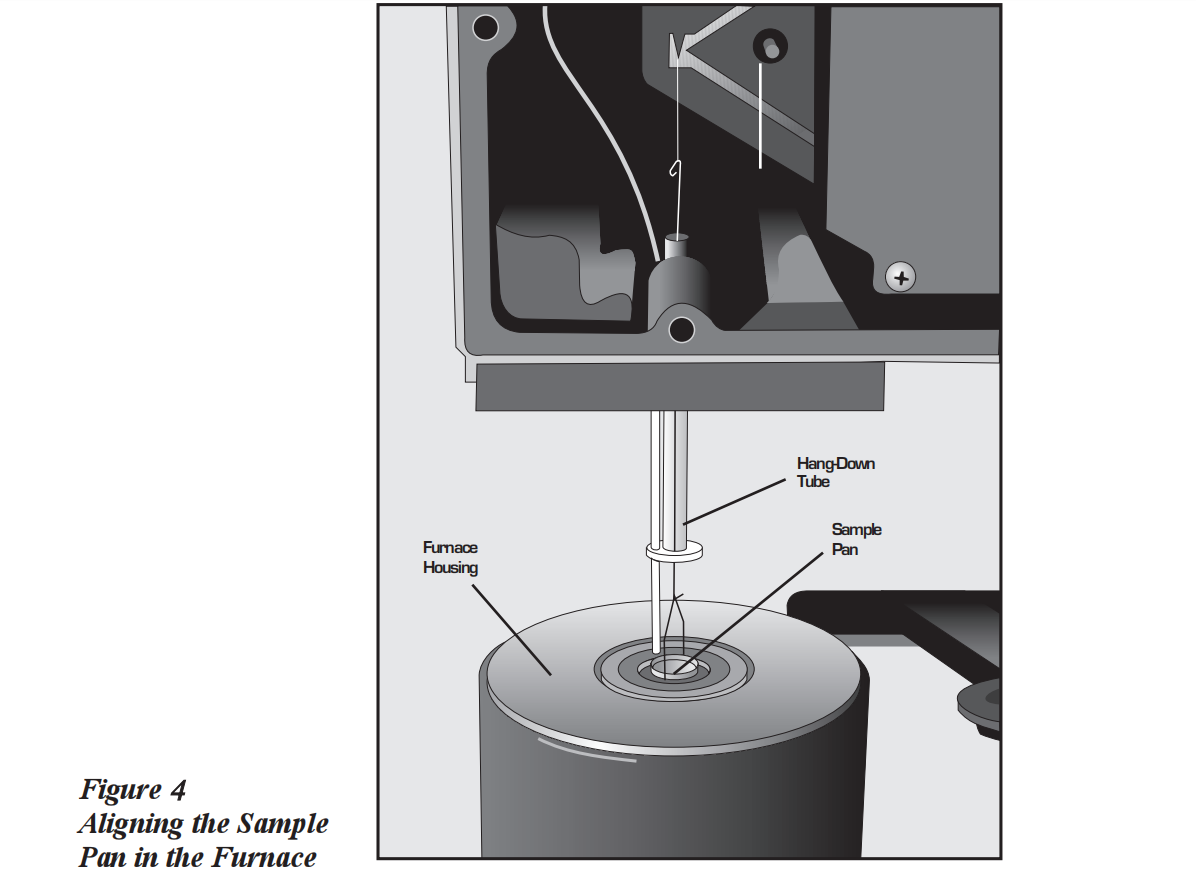
3 Adjust the feet on the bottom of the TGA instrument to level it. Turn the feet clockwise to make the legs longer, or counterclockwise to make them shorter. Do this until the sample pan is centered and hanging freely within the furnace.
4 Press the FURNACE button to decrease the furnace.
5 Press the UNLOAD button to take the sample pan out of the furnace.
6 Install the faceplate of the balance chamber and secure it with 6 screws.
This operation can be completed in a few simple steps and with minimal effort. After completing this step, you can be sure that the TGA 2050 and TGA 2950 are ready for use and that it will continue to provide accurate results.